Hello Azure Machine Learning!
Last week I have joined a workshop held by Microsoft called Microsoft AI Envisioning Workshop where we’ve became familiar with the basics of how Machine Learning works, what Neural Networks are and how can we build chat bots with Microsoft Bot Framework.
Those of you who follow me on Twitter might have seen my picture of my first Machine Learning project ever – the hello world of Azure ML 🙂
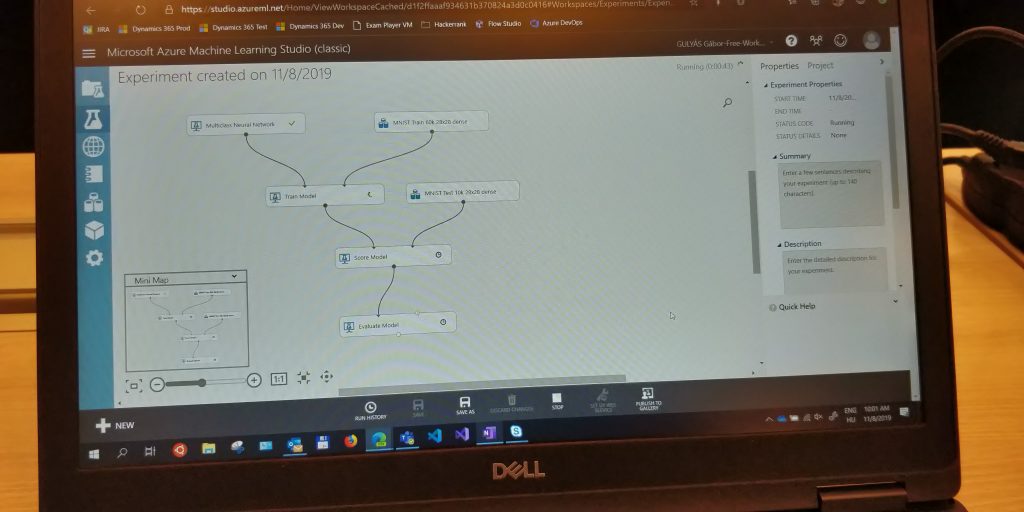
Boy that was a fantastic event, I’ve been poking the subject of Machine Learning since a long time but I never had the time to get started with it. Finally, I have made my first steps! Don’t get me wrong, I still don’t know what a Multiclass Neural Network is and how far would I get if I would have to prepare all my data, but at least I got to know the basics now!
In this post – which I plan to be a series of two posts – I want to show you how easy it is to get started in Azure Machine Learning by building up the same project that we have used in the workshop. However, this time we are going to build it in the brand new Azure Machine Learning Studio (Preview)!
Getting prepared
Azure Subscription
Before we do anything, please make sure that you already have an Azure subscription set up! I will do a post about how to get started with Azure and how to set up a new subscription, but for this example you should just head over to https://azure.microsoft.com/en-us/free/ to get a free trial – or use your existing account if you have one!
Don’t worry, your credit card information is required only for validation reasons, Microsoft will not charge you unless you remove your spending cap!
Sample Datasets
There was a sample dataset that we have used called MNIST Keras inside the Classic Machine Learning Studio. Unfortunately this sample is not included inside the new Machine Learning Studio – figures 😉
But worry not, I have uploaded them for you so you can download them both using the links below – I’ll get back to it why you need both of them and what do they contain:
Hello Machine Learning!
Now that we have our Azure Subscription set up and our datasets downloaded, let’s get started shall we? First things first, we will create a new Azure Machine Learning Workspace using the new resource option of the Azure Portal:
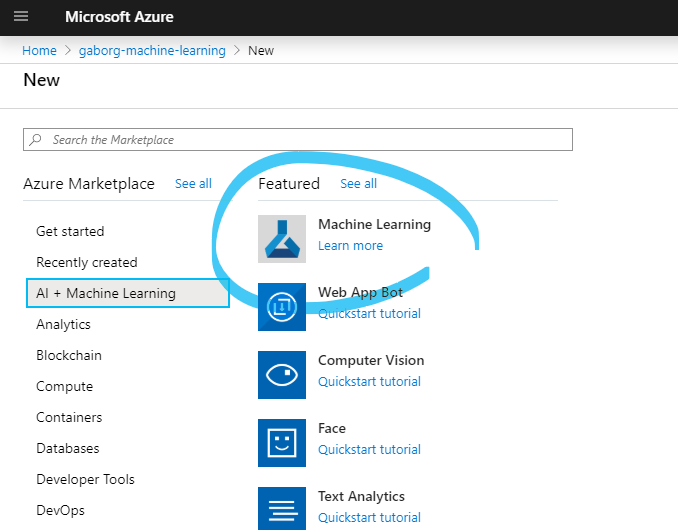
Here you will be presented with a very simple form you have to fill out. The only thing you have to keep in mind is that the workspace edition must be Enterprise, because only that contains the Machine Learning Studio designer.
Warning! At the time of writing, Enterprise workspace was still in preview and did not result in any surcharge! Changes in pricing might have changed since then, please read the pricing details here!
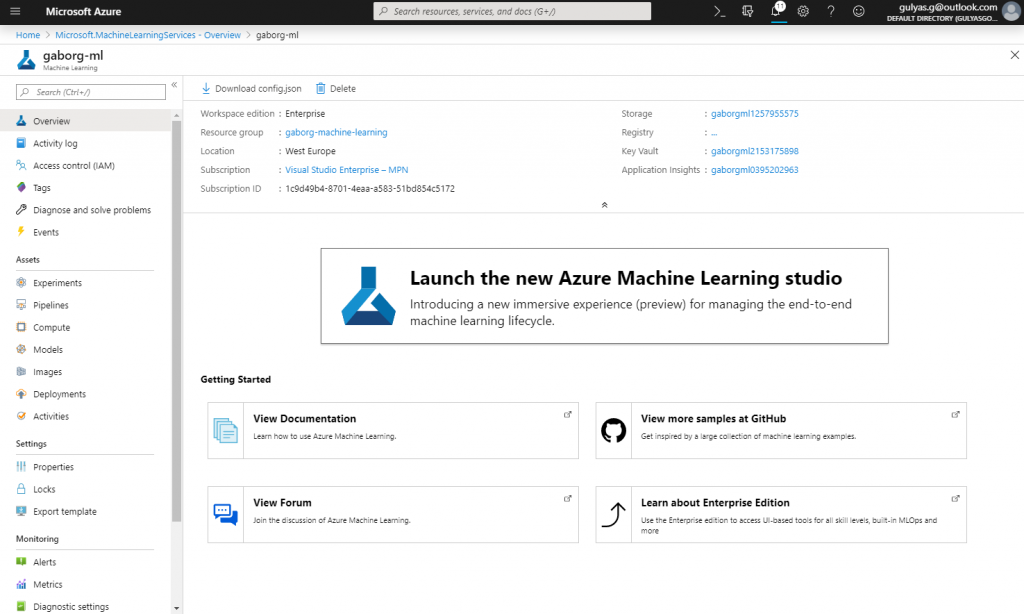
Once your workspace is up and running, go to the newly created resource in the portal and open up Azure Machine Learning Studio by clicking on the huge button or by navigating to https://ml.azure.com/.
Getting our datasets ready
When we are experimenting with Machine Learning projects, we are taking a different approach then we usually do in traditional problem solving. Instead of providing the input and the whole algorithm to run on it so we get the result, we provide the input and the expected result and we train the model to produce as close results as possible.
The dataset that we will be using is the MNIST dataset (Modified National Institute of Standards and Technology). This dataset contains 60,000 training and 10,000 testing images, all of them contains a drawing of a single digit from 0 to 9 in 28 x 28 pixels size images. All of these images are labeled, which means they have the expected outcome paired to them – so for example an image showing a zero digit has the number 0 paired to it as a label.
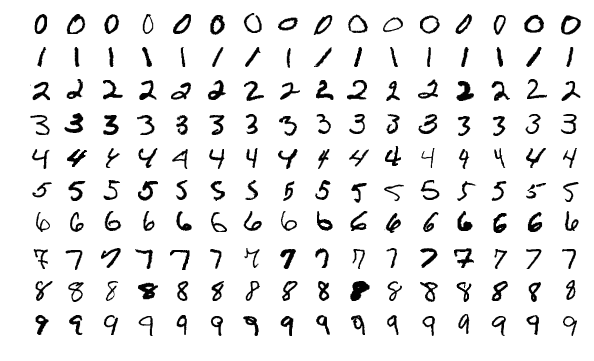
The images in the dataset are preprocessed for us. All images are trimmed to 28px squares, converted to black & white and then a tresholding is used to get a so-called binary image – as you can see on the image above. The algorithm will expect all images in this format.
When working on Machine Learning projects, you will need to have a separate set of data for training and testing. The reason for this is that you will use the former to train your model, so it actually starts understanding the connections between the images, while you will use the latter to test your model to see if it works properly on another set of data – which you did not use for training purposes.
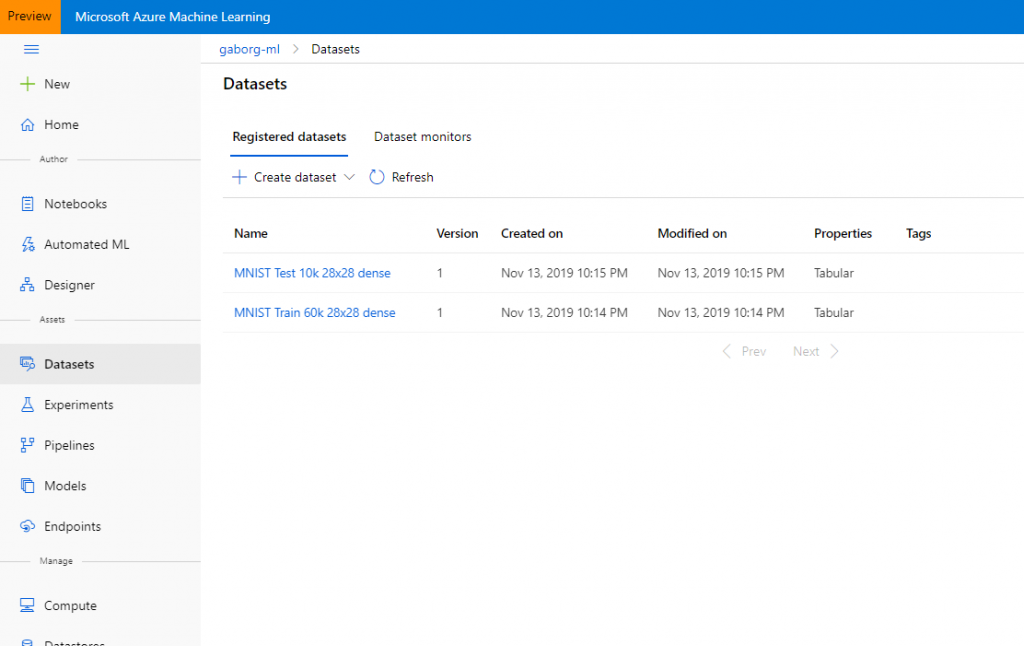
To upload the datasets, head to the Datasets page inside the Machine Learning studio and choose Create dataset. Here you should select the first one of the files and without changing anything, hit the next button. Wait for it to finish upload and go through the wizard – again, without changing anything because the default settings are okay for us 🙂
Then by doing the same with the other file, you should be presented with something like the following:
Great, now that we have our datasets ready, lets get into the designer!
Building the pipeline
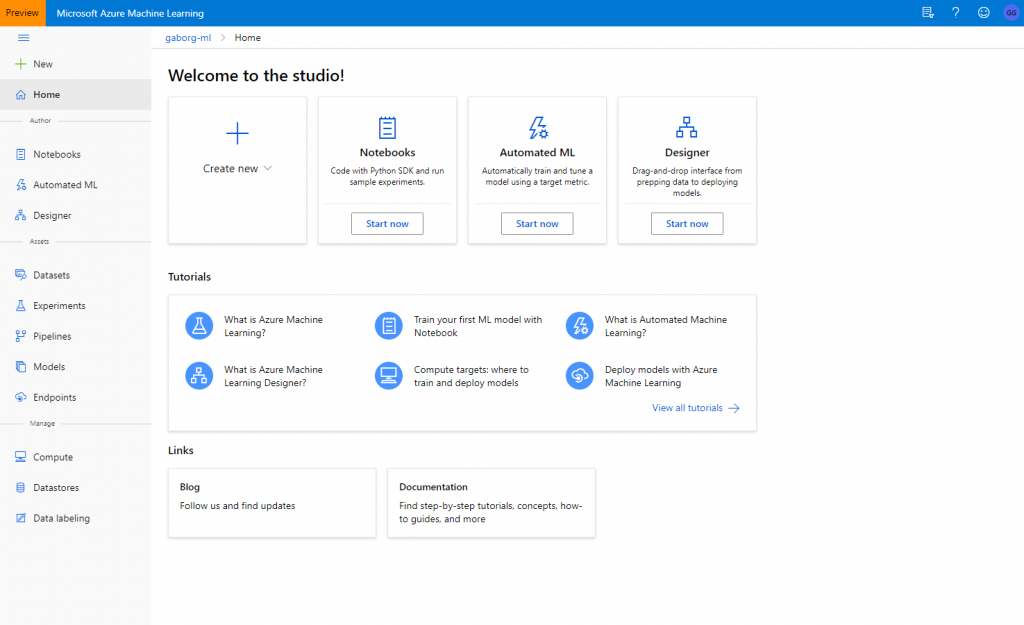
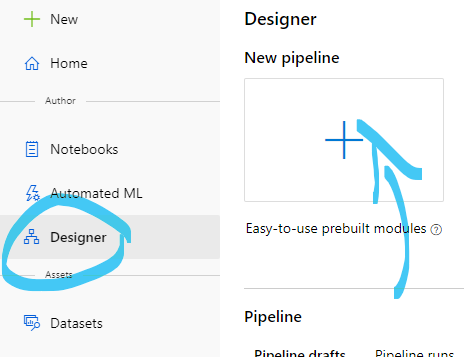
The designer is where all the magic happens – and of course we have Automated ML and Notebooks, but we will not use them this time 😉
When you open up the designer, you have the option to view or edit your previously created pipelines or just create a new one that contains a sample or you can start from scratch. We will do the latter, we’ll build our own!
Once we have created a new pipeline, we will be presented with the designer user interface itself. On the left, you will see a list of different elements that you can use to build up your pipeline. This includes datasets, algorithms, transformations and many more.
On the top you will have some controls for the pipeline and the user interface itself like save, zoom, copy & paste, the usual stuff. On the right, you have a settings pane – where you can fine tune not just your pipeline, but the selected pipeline elements themselves.
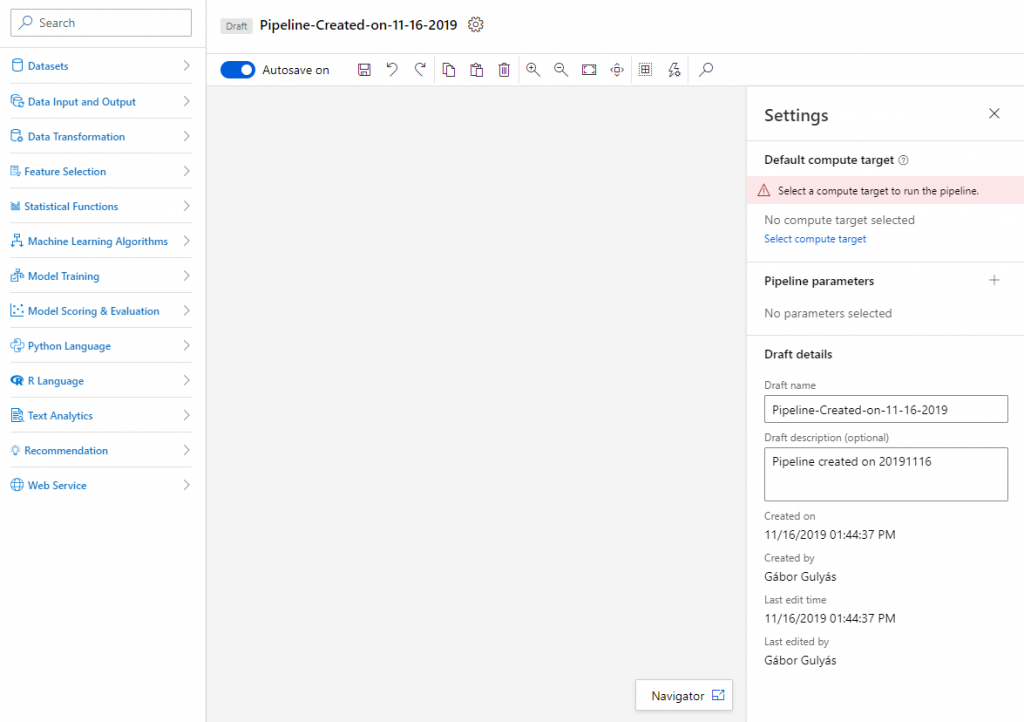
Note that as you can see on the right side of the screen, we don’t have a compute target to run the pipeline on. You will always need a compute target for the pipeline! So let’s go ahead and create a new one by clicking on “Select compute target” and selecting the “Create new” option at the top of the window.
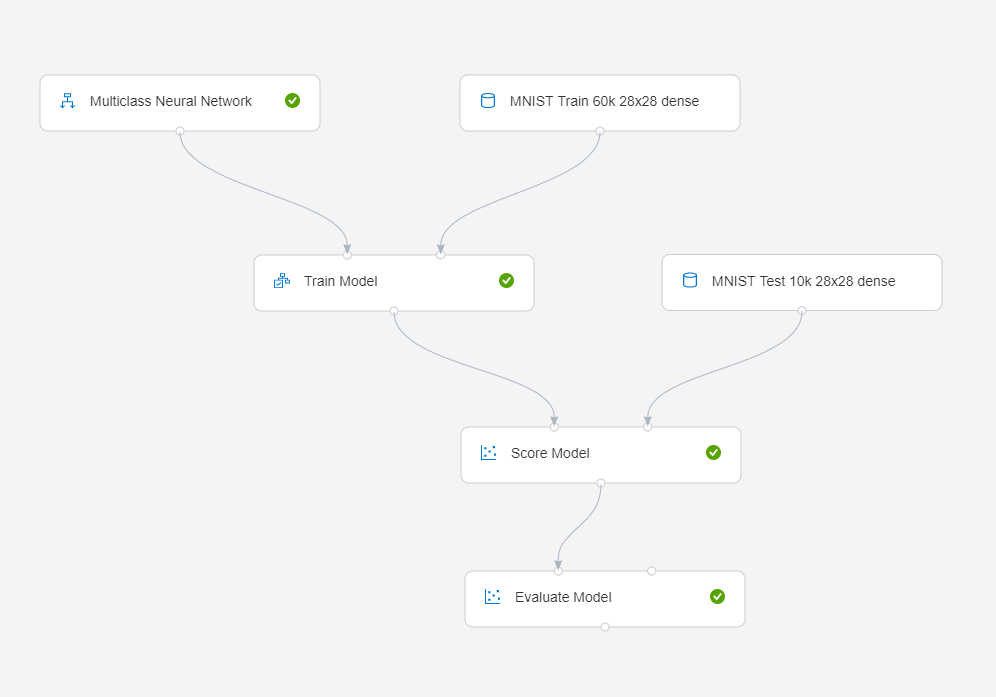
Now, for this particular Machine Learning project, we are going to use the following elements:
- Datasets: We are going to use two separate datasets.
- MNIST Train to train the model
- MNIST Test to test the model
- Multiclass Neural Network: Since we are using classification on a labeled dataset, this classification algorithm will be perfect for us.
- Train Model: To train the model with the training dataset.
- Score & Evaluate Model: To see how the trained model performs with the test dataset – how accurate it is.
Now we will build up the pipeline. I have created a video that you can find below to see how each element of the pipeline should be added and you should set them up to work properly!
Once you are done with building up the pipeline, run it by clicking on the Run button on the right side of the screen. Type in a name for your experiment and you are ready to go – the experiment itself will contain the built model that you will be able to publish later on for further use.
Congratulations! Your first Machine Learning pipeline is complete and you have built a model from it! By right clicking on the “Evaluate Model” step and selecting “Visualize Evaluation results” you will actually see how the model performed. Mine has an overall accuracy of 0.9778. Yours? 🙂
If you take a look at the visualization of the Score Model, you will see a lot of fields called f0, f1, f2, f3, …, etc. That is because the pixels of the image are flattened to a vector. Each value represents the color of a pixel where 0 means it is white, while 255 means it is black. The algorithm actually uses these values to determine what number is represented. Interesting, isn’t it?
What next?
We have built up our first Machine Learning pipeline and created an experiment from it. But right now, we cannot do too much with it can we? We need to create an application that we can use to send an image of a number to it.
As a second – and final – part of this series we will be creating a simple chat bot application where using our phone’s built in camera we will be able to send an image of a written number that the Machine Learning algorithm can predict with sending the result back to us in a message.
Until that, a great friend of mine #EvePardi – who is working as a Software Developer and Data Analyst at Laerdal in Copenhagen – posts fantastic tweets and blog posts about Machine Learning and different aspects of Artificial Intelligence. Oh yeah and lets not forget to read her post about Nepal Earthquakes focused mostly on how Machine Learning can save lives by using intelligent predictions! Check her blog out at https://codewitheve.azurewebsites.net/!
Closing words
I hope you have enjoyed the first part of this mini series! Looking forward to read the second part? Do you have any questions or are you stuck with something? There is a comment section down below 😉
See you next time!

Comments
EvePardi
Hej Gabor!
This is a fantastic post, and it was delighting to read that you are interested in the next steps. Thank you a lot too for mentioning me as an inspiration, and I hope I actually provide the quality you claim in my posts and tweets! Good luck with your next steps, an feel free to reach out if you need any guidance!!
Best,
EvePardi